Paul Gartside 18' Racing Gaff Cutter • Cabinversion designed by Dominik Gschwind

2012-08-12

Week 6 - Fairing / Sheating


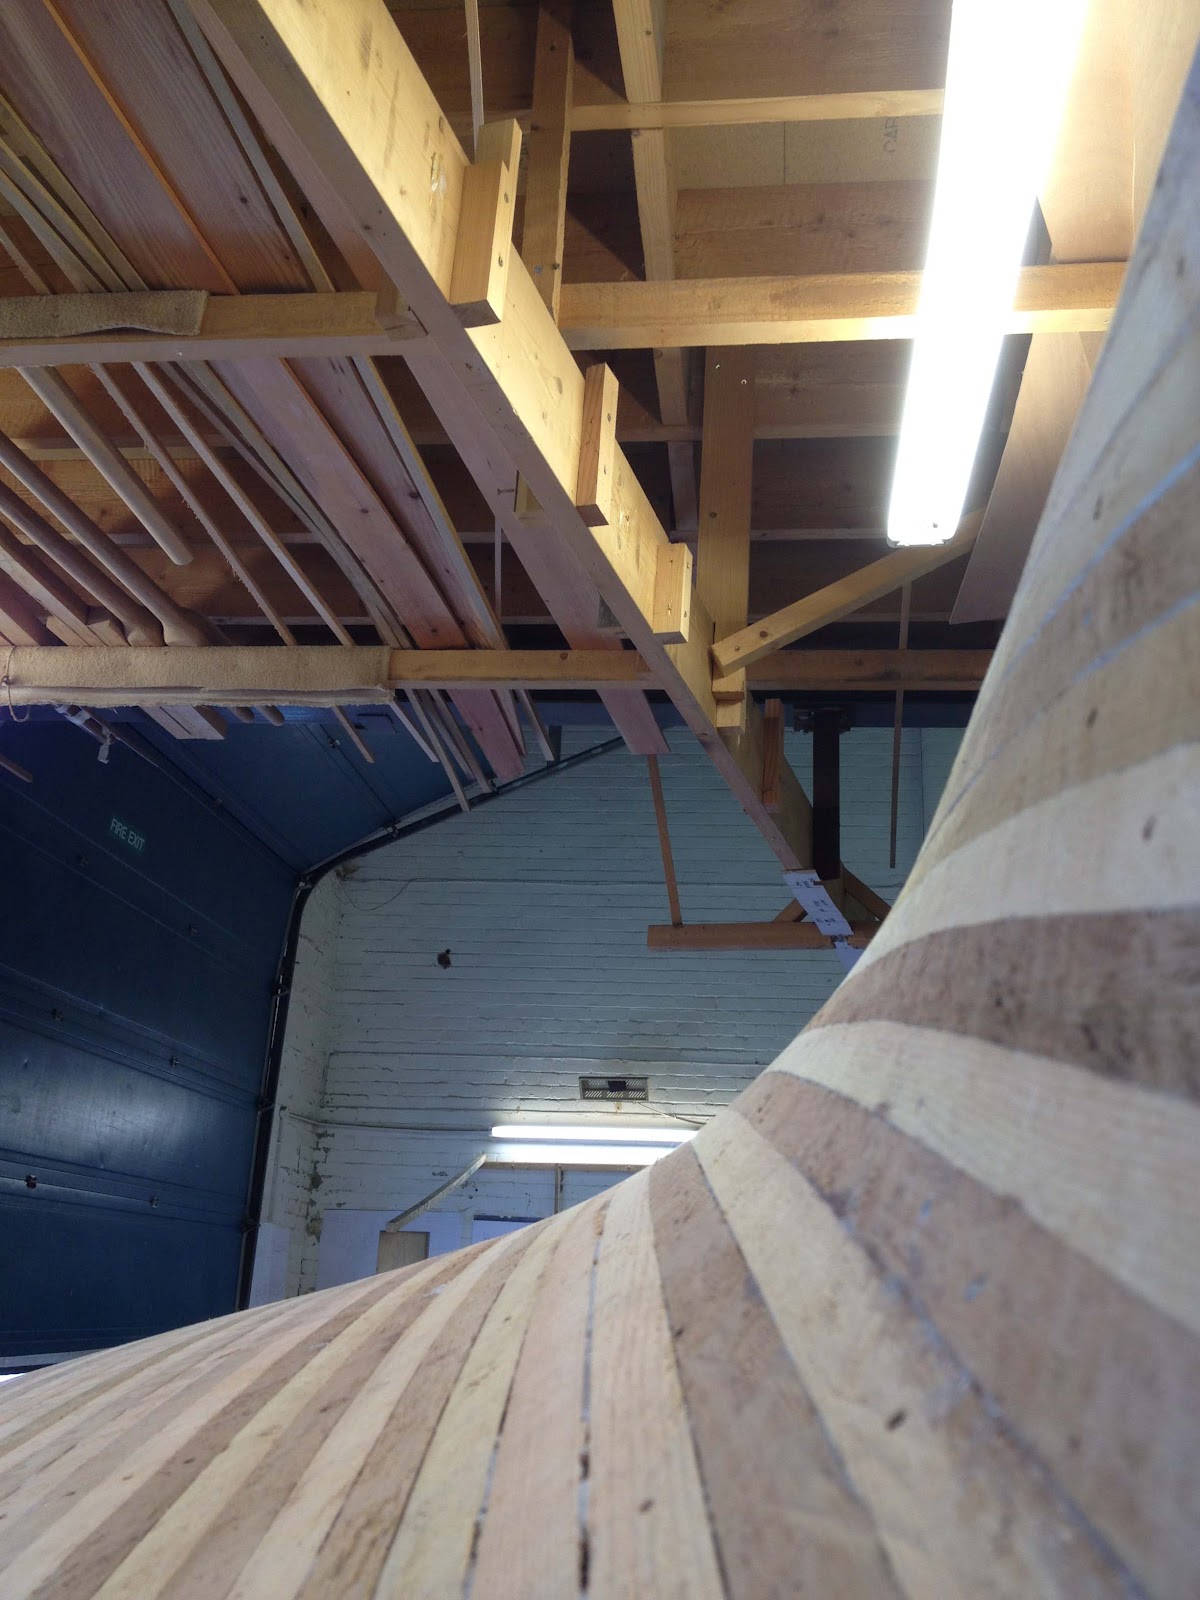
It took us 9 days to plank the whole hull with cedarstrips. To give the running off strips along the sheer a good support we noggled in a strong enough batten into the mouldes in which we could skrev the ends of the strips (see screws with washers on photo).


One night after the last strip beeing glued we started preparing the hull for sheating with epoxy and glass. This part involved all kind of trimming and fairing. First we planed the hog flat where later on the keelparts will be fitted. Then we took the gluerests off the whole hullsurface mainly with the smoother plane.


At the transom the strips could be sawn with the jigsaw and then planed flat.
Now when all sides where trimmed the hullsurface had to become fair before sheating. The process to do so is called scuffing off.
It's all done with different planes which are moved with diagonal strokes over the strips.
The convex part of the hull  was treated with a Nr. 4 smoothing plane and the concave areas at the skeg and bow were scuffed off with a spokeshave.
It is a great pleasure to feel the smooth and fair shape of Glóey's hull... she is really curvy and I am very pleased with the result of the planking.


Now let's go to the next step... sheating.
We use 2 layers of biaxial glass cloth of 300 g/m2 on the outside of the hull. Each layers has to overlap the former layer by about 3". The clothpanels ar layed loose atwartships and the for and aft position of each is marked on top to remember when laminating.


It is really worth to prepare the sheating very prudent specially when temperatures are high like now and the potlife of the mixed epoxy is limited.
All clothpanels are ready and stored on the table.


We were a team of 10 guys for that work meaning that there were 2 persons who permanently mixed epoxy, 2 who were closing all holes and gaps with filler and 4-6 guys who did the laminationwork with rollers.
At the stem it was necessary to cut the glass and fashion overlapping to either side.

After a cup of tea it took another 1.5 hours to apply a rel. thick coat of epoxy mixed with sanding bubbles. This white material is layed up wet in wet which gives a very good primary bond (chemical bond). And it is softer to sand than pure epoxy.


All together it took us a whole afternoon to do the sheating (without cutting the cloth) and it ended with a white hull... somehow looking a little bit like a plastic boat but the decorativ pattern of the nice western red cedar strips will be varnished bright inside the cabin later which will give a warm wooden atmosphere...

2012-08-01

Week 5 - oarmaking

This week we focused mainly on oarmaking and left the hulls resting for some days.
It was an absolutely amazing woodworkingweek and making oars in that manner is just such an emotional nice craft.
All starts with some quite coarse chunks of wood and the final finish is just superb... what a transformingprocess.
Sorry if I became a little emotional in that introduction but traditional oarmaking is really a joy for all senses!


But let me explain the workflow a little more in detail:


These oars will be part of the boat and in the case of my sailingboat "Glóey" the shape and dimensions became slightly different to the typical oars of a rowing skiff.
I wanted to make them shorter and a little wider what ended up with a kind of a hybrid solution between an oar and a paddle.
The idea is that Glóey can be moved in and out of the harbour without a motor. So the reduced length of 188 cm and the less concave faces of the oarblades allow both rowing with rowlocks (sitting in the toerail on the sheer) as well as paddeling.
And besides that size fitts just in under the washboards (behind benches in cockpit) to store them while cruising because I really wanted to avoid having them in the cabin.


To get a maximum of formstability and strength the whole oar is glued together of several strips of soft- and hardwood. We use mainly sitka spruce a very light timber with long fibres from the northwest of Amerika and sapele mahogany for reinforcing and decorativ stringers and the protecting tip at the end.


After tracing the outline of the blade to the laminate and sawing the whole thing with the bandsaw in 2 directions the finework with different planes commences.
The outline is mainly planed with a flat and a convex spokeshave and the inner face of the blade with a bollow plane.
As very often on laminates the grain changes along the workingpiece and therefor I relatively fast started to work with my roundet scraperblade which in fact also acts like a plane but the risk for tearing the surface is much lower.


After also planing the back of the blade the whole surface got it's first sanding.


Ok, at that stage the loom is still square and on the following photos you can see how the technique works to get them round.
The princip is relatively simple... it's a convergency via polygons. Starting with an octagon which can be marked with a selfbuilt spargauge (see photo).
To get a lot of material away in a effectiv way the drawknife does an excellent job.


The blockplane will then help to get the octagonsurfaces nice and flat. After shaping a polygon of 8 you continue with 16, 32 and finally 64 surfaces.
This is the theory and in reality you only mark 8 and 16 sided polygons and from then on all is pure eyework.


Once the whole loom has got a nice round shape the sandingprocess will make everything smooth and fine.


I decided to fashion a very simple but functional and decorativ handle which is based on a cone and a rounded reduction.
To reinforce the end of the oar on the bladeside we joint a piece of sapele hardwood called a tip simply with a glued scarfjoint.


The final work consisted of a serie of sandings starting with 80 grit then 120, 180 and finally 240 which gave the whole oarsurface a very smooth feel.
I didn't want to varnish my oar but oiled it several times with decksoil.


yeah and here it is ... my finished oar for Glóey... ready for use ...